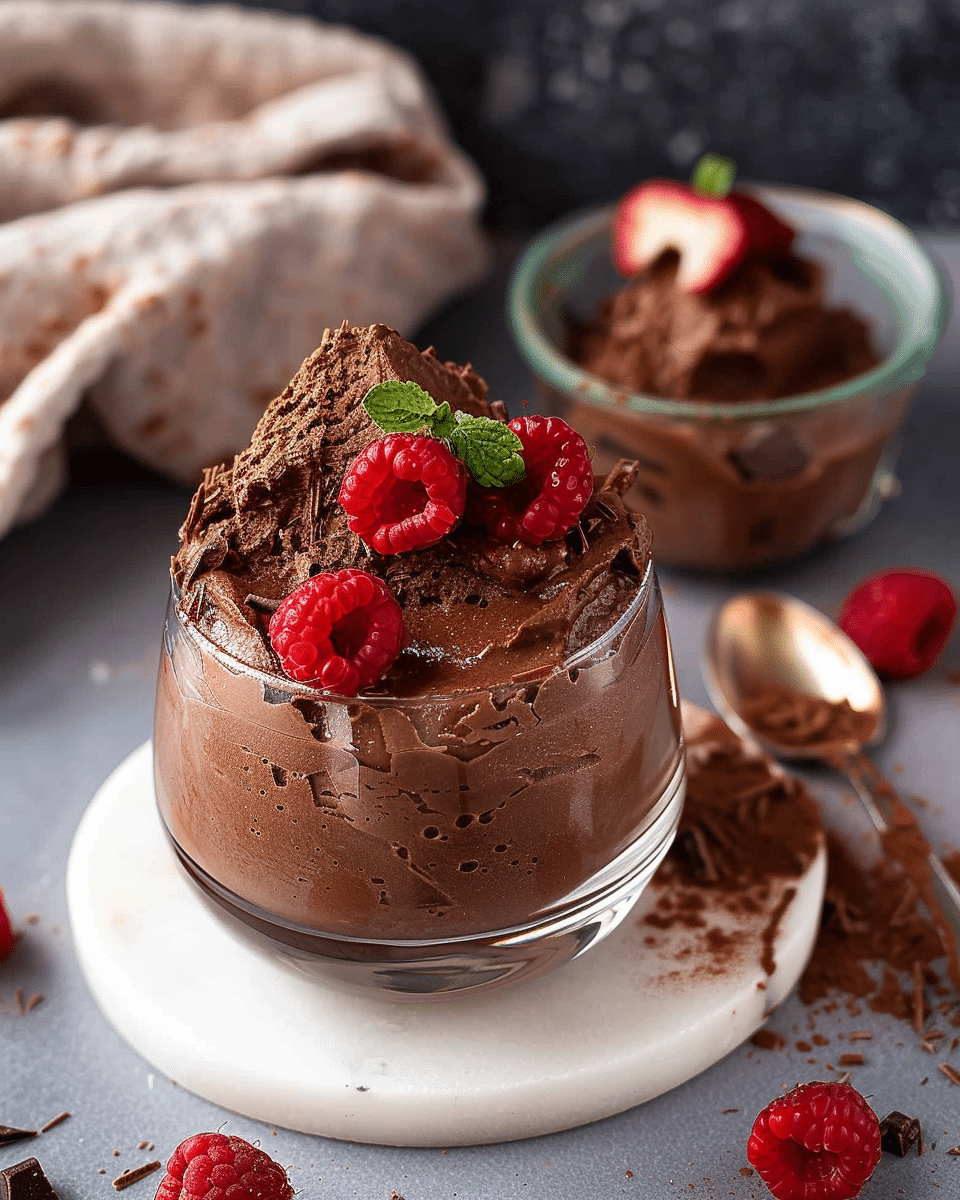
This easy chocolate mousse is creamy, rich, and surprisingly simple to make. With just a few ingredients and minimal hands‑on time, you’ll have a smooth, airy dessert that feels elegant but doesn’t require complicated technique.
Why You’ll Love This Recipe
It uses few ingredients and no baking, making it perfect when you want a treat without turning on the oven.
The texture is light and fluffy while still offering decadent chocolate flavour.
You can prepare it ahead of time, making it ideal for entertaining or a stress‑free dessert.
It’s versatile: you can serve it in simple glasses, dress it up with toppings, or layer it in more elaborate desserts.
Ingredients
(Tip: You’ll find the full list of ingredients and measurements in the recipe card below.)
Good quality dark chocolate (preferably at least ~60% cocoa)
Heavy whipping cream (cold)
Sugar (granulated or powdered, depending on method)
Vanilla extract (optional)
Pinch of salt (optional, to enhance flavour)
Directions
Chop the dark chocolate into small pieces and place in a heat‑proof bowl. If you like, melt with a small knob of butter for extra glossiness and richness.
Heat a portion of the heavy cream until it’s just about to simmer (do not boil). Pour the hot cream over the chopped chocolate and let sit for about 30 seconds, then stir until the chocolate is completely melted and smooth.
Let the chocolate‑cream mixture cool until it’s just slightly warm or at room temperature. Meanwhile, whip the remaining heavy cream with sugar (and vanilla if using) until it reaches medium‑firm peaks (it should hold shape but still look soft and creamy).
Gently fold the whipped cream into the cooled chocolate mixture. Use a rubber spatula and fold from the bottom up, turning the bowl as you go, until the mixture is uniform but still airy. Avoid over‑mixing so you don’t deflate the air you’ve whipped in.
Divide the mousse into individual serving cups or one larger dish. Chill in the refrigerator for at least 1–2 hours (or until fully set) before serving. This chilling helps the mousse firm up and the flavours meld.
When ready to serve, optionally top with whipped cream, chocolate shavings, berries, or a dusting of cocoa powder.
Servings and timing
Servings: approximately 4–6 servings (depending on portion size).
Prep time: ~10–15 minutes active time.
Chill time: At least 1–2 hours (can be refrigerated longer if desired).
Total time: Around 1 h 15 min including chill time (but only ~15 minutes active work).
Variations
Egg‑free version: Use just whipped cream and melted chocolate (skip eggs entirely) for a simpler mousse. Some recipes even use only cream, cocoa powder and sugar.
Vegan/plant‑based version: Use plant‑based milk/cream and dark chocolate (vegan). Some recipes rely on three ingredients only for a rich vegan mousse.
Flavoured mousse: Add espresso powder for depth, or orange/raspberry zest for a citrus/fruit twist.
Layered dessert: Use this mousse between cake layers, or as part of a parfait with fruit and whipped cream for a showy presentation.
Stabilised version for warm climates: If storing in warmer environment, you can add a small amount of gelatin for extra stability.
Storage/Reheating
Storage: Cover the mousse and store in the refrigerator. It will keep well for up to 2‑3 days. Over time the texture may slightly loosen, but it remains delicious. Reheating: Mousse is best served chilled; reheating is not recommended as it changes the texture and defeats the point of the airy cream. If it becomes very firm from chilling, you can let it sit at room temperature for 10 minutes before serving. Make‑ahead tip: You can prepare the mousse one day ahead, cover and refrigerate, then add toppings just before serving to keep them fresh.
FAQs
1. Can I use milk chocolate instead of dark chocolate?
Yes, you can. But be aware: milk chocolate will make the mousse noticeably sweeter and the chocolate flavour less intense. Dark chocolate around 60‑70% cocoa gives the best balance of richness and sweetness.
2. Do I have to use raw eggs in the mousse?
No — many easy mousse recipes skip raw eggs entirely and rely on melted chocolate + whipped cream. If you encounter a recipe using egg yolks and whites, you can choose pasteurized eggs for safety.
3. What happens if I over‑mix when folding?
Over‑mixing will deflate the whipped cream, resulting in a heavier, denser mousse rather than light and airy. Use gentle folding and stop as soon as the mixture is uniform.
4. How can I tell when the mousse is done?
The mousse should be smooth and hold its shape when spooned or piped. After chilling, it should be set but still give slightly under your spoon. If it’s too loose, it may not have enough whipped air or the chocolate mixture was too hot when folded.
5. Can I add fruit or toppings?
Absolutely. Fresh berries, whipped cream, chocolate shavings, toasted nuts, or a sprinkle of sea salt all work beautifully on top. These add texture and a flavour contrast.
6. Is there a gluten‑free version?
Yes — chocolate mousse naturally can be gluten‑free (just check that your chocolate is gluten‑free and you’re not adding any gluten‑containing toppings or flavourings).
7. Why is my mousse grainy or separated?
Possible reasons: the chocolate was overheated or allowed to seize; the whipped cream was over‑whipped or too cold/hot; or the folding was too vigorous. Use quality chocolate, melt gently, whip cream to correct peaks, and fold carefully.
8. Can I make the mousse in advance for a dinner party?
Yes — this is an ideal make‑ahead dessert. Prepare and chill the mousse ahead of time, and add toppings just before serving to keep them fresh.
9. My mousse seems too soft after chilling — what did I do wrong?
If the mousse is too soft, it could be that there was insufficient whipped cream, or the chilling time was too short, or the chocolate‑cream base was not properly into the whipped cream while still warm (which may have loosened the foam structure). Next time allow longer chill and ensure the base is cool before folding.
10. Can I pipe this mousse into glasses or desserts?
Yes — if the mousse holds firm peaks when chilled and you’ve folded carefully, you can transfer it into a piping bag and pipe it into serving glasses or use it in layered desserts. Just ensure it’s chilled enough so that it holds its shape.
Conclusion
This easy chocolate mousse brings together elegance and ease — rich chocolate flavour, smooth texture, minimal prep and no baking required. Whether you’re serving a casual treat or impressing guests, this dessert fits beautifully into your repertoire. With just good chocolate, heavy cream, sugar and a bit of chill time, you’ll have a dessert that looks and tastes like a special occasion. Enjoy creating and indulging!
These Lemon Glazed White Chocolate and Raspberry Blondies are chewy, buttery dessert bars filled with creamy white chocolate and juicy raspberries, then topped with a bright, tangy lemon glaze. Perfect for summer gatherings or as an elegant treat for any occasion.
Author:Catherine
Prep Time:20 minutes
Cook Time:30 minutes
Total Time:1 hour (including cooling and glazing)
Yield:9–16 bars
Category:Dessert
Method:Baking
Cuisine:American
Diet:Vegetarian
Ingredients
1/2 cup unsalted butter, melted
3/4 cup granulated sugar
1/4 cup light brown sugar (optional, for added depth)
2 large eggs
1 teaspoon vanilla extract
1 tablespoon lemon zest
2 tablespoons lemon juice
1 cup all-purpose flour
1/2 teaspoon baking powder
1/4 teaspoon salt
3/4 cup white chocolate chunks or chips
3/4 cup fresh raspberries (or frozen, thawed and drained)
For the glaze:
1 cup powdered sugar
1–2 tablespoons lemon juice
Optional: 1 teaspoon raspberry purée for color
Instructions
Preheat oven to 350°F (175°C). Line an 8×8″ or 9×9″ square baking pan with parchment paper or grease well.
In a large mixing bowl, whisk together melted butter, granulated sugar, and brown sugar until well combined.
Add eggs, lemon zest, lemon juice, and vanilla extract. Whisk until smooth.
In a separate bowl, whisk together flour, baking powder, and salt. Fold dry ingredients into wet ingredients just until combined.
Fold in white chocolate chunks, then gently fold in raspberries (if using frozen, coat in a little flour first to reduce bleeding).
Spread batter evenly in the prepared pan and smooth the top.
Bake for 25–35 minutes, or until edges are golden and a toothpick inserted into the center comes out with a few moist crumbs.
Allow blondies to cool completely in the pan on a wire rack before glazing.
For the glaze: whisk together powdered sugar and lemon juice (add raspberry purée if using) until smooth but thick. Drizzle or spread over cooled blondies.
Let glaze set, then lift blondies from the pan and cut into squares. Serve at room temperature or slightly chilled.
Notes
Use high-quality white chocolate for best texture and flavor.Gently fold raspberries to avoid over-bleeding into batter.Chilling the bars before slicing yields cleaner cuts.Optional: add toasted nuts for crunch or swap in blueberries for a twist.Don’t overbake — blondies are best slightly fudgy in the center.


