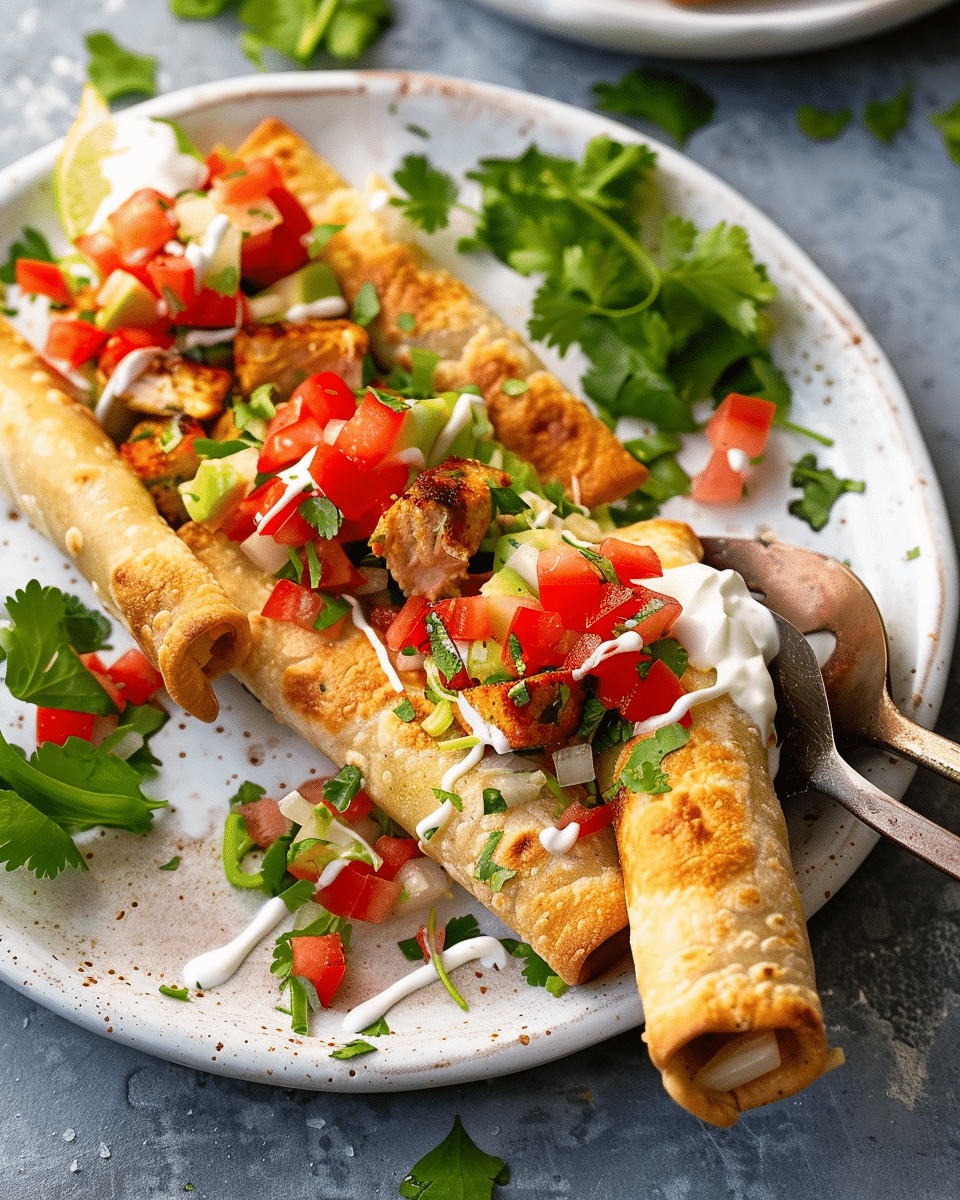
These taquitos are crunchy on the outside and packed with savory, cheesy chicken on the inside. They’re a great way to use up leftover chicken, and they freeze beautifully for make-ahead meals. Plus, they’re totally customizable with your favorite seasonings and toppings. Whether you bake or fry them, taquitos are a family favorite that comes together quickly with just a few ingredients.
Ingredients
(Tip: You’ll find the full list of ingredients and measurements in the recipe card below.)
Shredded cooked chicken (rotisserie chicken works well)
Shredded cheese (cheddar, Monterey Jack, or a blend)
Cream cheese or sour cream (optional for added creaminess)
Garlic powder
Onion powder
Ground cumin
Chili powder or taco seasoning
Salt and pepper
Corn or flour tortillas
Cooking oil (for frying or brushing if baking)
Directions
Preheat oven to 425°F (220°C) if baking. Line a baking sheet with parchment paper.
In a bowl, mix shredded chicken, cheese, cream cheese (if using), and seasonings until well combined.
Warm tortillas slightly to make them pliable.
Place 2–3 tablespoons of the chicken mixture near one edge of each tortilla, then roll tightly into a cylinder.
Place rolled taquitos seam-side down on the baking sheet.
Brush lightly with oil or spray with cooking spray.
Bake for 15–20 minutes until crispy and golden, or pan-fry in oil over medium heat until golden and crisp, about 2–3 minutes per side.
Serve warm with your favorite dips.
Servings and timing
This recipe makes about 12 taquitos and serves 4–6 people. Total time is about 30 minutes, including 10 minutes of prep and 15–20 minutes of cooking.
Variations
Spicy Taquitos: Add chopped jalapeños or hot sauce to the filling.
Veggie Boost: Stir in sautéed onions, bell peppers, or spinach for extra nutrition.
Saucy Option: Drizzle with salsa verde or enchilada sauce before baking for extra flavor.
Air Fryer: Cook in the air fryer at 400°F for 8–10 minutes until crispy, flipping halfway.
Dairy-Free: Use dairy-free cheese and omit cream cheese.
Storage/Reheating
Store leftover taquitos in an airtight container in the refrigerator for up to 3 days. Reheat in the oven or air fryer at 375°F until heated through and crisp again. For longer storage, freeze uncooked or cooked taquitos in a single layer, then transfer to a freezer-safe bag for up to 2 months. Reheat from frozen at 400°F for 15–18 minutes.
FAQs
Can I use flour tortillas instead of corn?
Yes, both work well. Corn tortillas are more traditional, but flour tortillas tend to be softer and easier to roll.
How do I keep the taquitos from unrolling?
Place them seam-side down when baking or frying, and use a bit of filling to help seal the edge.
Can I make these ahead of time?
Absolutely. Assemble them and refrigerate for up to a day before baking or freeze for later.
Can I bake instead of fry?
Yes, baking is an easy, healthier option that still gives a crispy finish.
What kind of chicken should I use?
Cooked shredded chicken from a rotisserie or leftovers works perfectly.
Are taquitos gluten-free?
If you use corn tortillas and check that your seasonings are gluten-free, then yes.
What are good dipping sauces?
Salsa, guacamole, sour cream, chipotle mayo, or queso all pair well.
Can I add beans to the filling?
Yes, black beans or refried beans add heartiness and flavor.
How do I prevent tortillas from cracking?
Warm them before rolling to soften and make them more flexible.
Can I cook taquitos in the air fryer?
Yes, air frying is quick and gives a perfectly crisp texture—cook at 400°F for 8–10 minutes.
Conclusion
Chicken Taquitos are a crispy, cheesy, and crowd-pleasing meal that’s easy to make and even easier to love. Whether baked, fried, or air-fried, they’re perfect for weeknight dinners, parties, or make-ahead lunches. Customize them with your favorite fillings and dips, and enjoy a homemade version of this classic favorite anytime.
Frozen Banana Ghost Pops are spooky, fun Halloween treats made from frozen banana halves coated in white chocolate or yogurt and decorated with ghostly faces. They’re a healthier, no-bake dessert perfect for kids and Halloween parties.
Author:Catherine
Prep Time:15 minutes
Cook Time:0 minutes
Total Time:2 hours 45 minutes (including freezing)
Yield:6 pops
Category:Snack
Method:No-Bake, Freezing
Cuisine:American
Diet:Vegetarian
Ingredients
3 ripe bananas (not overripe)
1 cup white chocolate chips or vanilla yogurt
1 teaspoon coconut oil (if using chocolate)
18 mini chocolate chips or black decorating gel (for eyes and mouths)
6 popsicle sticks or lollipop sticks
Instructions
Peel the bananas and cut each in half crosswise to make 6 pieces.
Insert a popsicle stick into each banana half and place on a parchment-lined baking sheet.
Freeze for 1–2 hours until the bananas are solid.
Melt white chocolate with coconut oil in the microwave in 30-second bursts, stirring until smooth, or use vanilla yogurt as the coating.
Dip each frozen banana into the chocolate or yogurt, coating evenly. Let excess drip off.
While coating is still soft, press on mini chocolate chips to create eyes and a mouth.
Return dipped bananas to the parchment-lined tray and freeze for another 30 minutes or until fully set.
Serve directly from the freezer for a frosty Halloween treat.
Notes
Use dairy-free white chocolate or coconut yogurt for a vegan version.
Add crushed nuts, shredded coconut, or Halloween sprinkles before freezing for extra fun.
Ensure bananas are well-frozen before dipping to prevent slipping off the stick.
Candy eyes or icing can be used instead of mini chocolate chips for decoration.
Store in a freezer-safe container with parchment between layers for up to 1 week.


